The Mommy Games has a new home! Come see me at www.themommygames.com!
New Digs!
The Mommy Games has a new home on the web! I’m so excited to show you my new, pretty site – www.themommygames.com!
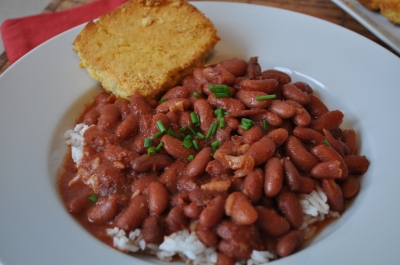
Slow Cooker Red Beans & Rice
Can you tell that I’m a little obsessed with my slow cooker? This puppy gets some major use around our house. And you are going to love this recipe! It’s so simple that my 2-year old seriously did 90% of the work. Next time you don’t think you have time to make dinner, take 5 minutes in the morning and pop this in (and 20 seconds to soak the beans the night before), and you will be rewarded with a delicious, comforting meal that’s practically ready to go when you walk in the door. What makes this recipe extra special is the added ham hocks, which you can shred and leave in or remove once they are done cooking. You could also do sausage if that’s more your speed, but I love the smokiness from the ham.
If you want to make this super easy, heat up some frozen pre-cooked rice. The rice in the bag that you microwave is an option too, but personally, it gives me the hebegebees. Best option – get yourself a small rice cooker. I love ours and it takes out all the guesswork. Rice, water, hit button, (wait 20 minutes), done. Enjoy!
Red Beans & Rice with Smoked Ham Hocks
Adapted from Fix-It and Forget-It
1 lb. package dried red beans
2 ham hocks
2 tsp. salt
1 tsp. pepper
4 cups water
6 oz. can tomato paste
8 oz. can tomato sauce
4 garlic cloves, minced
cooked rice
- Soak beans in water overnight. Drain and discard water.
- Place all ingredients (except rice) in slow cooker, cover and cook on low 10-12 hours, or until beans are soft.
- Remove or shred ham hocks and stir back into beans.
- Serve over rice.
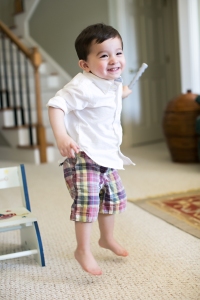
Brandon 2.25 Years Summary
Brandon has grown by leaps and bounds these past few months. I feel like he’s turned into a little boy and has truly left his baby days behind. We are so proud of the little man he is becoming. Many of the struggles I mentioned in his last summary have worked themselves out, mainly due to his major increase in vocabulary. His talking has increased 10 fold. We love being able to actually communicate with him and are constantly amused at the things he says. One of the first real sentences he ever said took place after dinner when I was asking him if he wanted a cookie. He quickly and enthusiastically replied, “I LOVE COOKIES!” It was a major turning point for him and now the words just won’t stop coming.

Brandon started school back in September. We were hesitant about it at first, since he was just barely two (only in NYC would 2 days a week for 2.5 hours of school cost as much as most college tuitions – but that’s a whole other topic!), but he absolutely loves it! He asks me daily if he can go back to school. He loves his teachers, classmates, even his puppy backpack. We went through a few days where he would need to be coaxed into the classroom before I left, but now I am totally forgotten once the room/toys/friends are in sight. Why do I have the feeling that he won’t approach high school with the same amount of gusto??

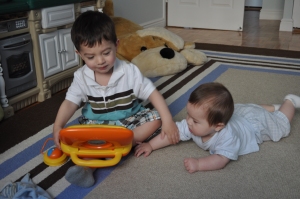
He remains a super sweet kid, and his teachers tell me all the time that he loves to sit in their laps during story time and is giving them hugs and high-fives the whole morning. He does the same with all his friends & family, even Rylan gets hugged before bedtime and naps. Brothers hugging is enough to make my heart melt. I’m so glad he is a cuddler, because every time I get a little sad that he is growing up, he will gladly let me hold and snuggle with him for a few minutes. Again, I don’t really see this lasting into his high school days. 🙂 On this same note, Brandon has been a really great big brother to Rylan. He actually likes to interact with him now, and when he got a new truck the other day, he immediately ran in to “show RaRa!” These are the sweet moments I want to lock away and remember forever. Rylan, in return, could not possibly idolize his big brother more.
Brandon continues to love and be a total whiz with the ipad. He has a very limited amount of time with it each day (and he has to choose between it and tv), but it’s really amazing to see him work it. He especially loves this Starfall ABC app. You can imagine mine and Brad’s surprise when we were eating dinner the other night and all of a sudden he spouts off all the letters of his name which are written on his place mat (even lowercase). We proceeded to jump over to our foam floor mat that has a bunch of letters on it and he could name all of them too. Guess he’s learning something from the ipad after all!! When he isn’t enthralled in technology, in typical boy fashion, his obsession right now is with anything with wheels. Trucks, cars, choo-choos – he loves it all. There are constantly races going on and many, many crashes. He also loves to cook with me. We got this learning tower not long ago and it’s been the best. He stands on it and holds his elmo spoon and helps me stir, pour, and measure practically any time I bake or am doing something away from the stove.
I can’t wait for the upcoming holidays – he already asks for new toys daily, so I know Christmas this year is going to blow his mind! And maybe Halloween will help him put on a few pounds. 🙂 We love you sweet boy!
Here’s a typical day for Brandon at 27 months:
7:20 – wake-up, get dressed, play while Mom feeds Rylan
7:45 – breakfast
8:15 – outside!! (School from 8:45-11:30 2 days a week)
9:30 – playtime with mom (learning activities/crafts/baking)
10:30 – independent play
11 – free play with Rylan
11:30 – dvd or Ipad
12 – lunch
12:45-3:15/3:30 – nap
3:30 – snack & play/outing
5 – independent play
5:30 – dvd or Ipad
6 – Dad comes home (highlight of his day!) and dinner
7 – bath with Dad and bottle of pediasure, family reading time, brush teeth
7:30 – Bed!!
All photos courtesy of the amazing Laura Stone of Artstar Photography.
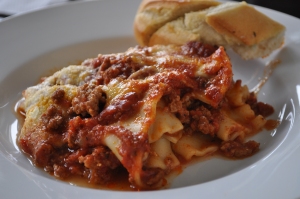
Rao’s Lasagna
Where did Fall go? I feel like it’s already Winter outside! After 7 years in NYC, I’m still a Floridian at heart, so I don’t exactly welcome the colder months with open arms. A warm, comforting meal like this lasagna makes it a bit better though. Lasagna is not a weeknight kind of meal. Although none of them are difficult in the least, there are numerous steps and it does takes a bit of time to get to the finished product. But it’s so worth it. And this recipe makes enough to feed an army, so you will certainly have leftovers to put in your freezer for a second meal (unless you are, in fact, feeding an army).
I have had great luck making many of Rao’s famous dishes at home, and this is another classic to add to the list. I love this recipe because it has a meaty, flavorful sauce that is in perfect balance with the salty bite of the Pecorino Romano. If you like, make extra sauce and freeze it to serve with pasta. It’s delicious.
Rao’s Lasagna
Adapted from Rao’s Cookbook
Makes 12 servings
1/2 cup olive oil
1 T minced garlic
2 lbs. lean ground beef
1 lb. Italian sausage meat (sweet or hot, casings removed)
1/2 cup red wine
3 T tomato paste
5 cups water
salt & pepper
2 lbs. ricotta cheese
2 egg yolks
1 pound lasagna noodles
2 cups mozzarella cheese, grated
1 cup Pecorino Romano cheese, grated
1 pound mozzarella cheese, sliced
- In a large saucepan, heat oil over medium-high, add onion and garlic and saute for 3 minutes.
- Stir in beef and cook until browned (about 5 minutes).
- Remove beef mixture from pan, then add sausage and cook until browned.
- Return beef mixture and wine into the pan with sausage and cook for 5 minutes (until wine has evaporated).
- Stir in tomatoes, tomato paste, water, and salt and pepper.
- Simmer for about 2 hours, stirring occasionally.
- Add more water if necessary (1/4 cup at a time), and skim off excess fat with a spoon or by laying paper towels on top of sauce.
- Meanwhile, place ricotta into a cheesecloth-lined colander and allow it to drain in the refrigerator for 2 hours.
- Combine drained ricotta with egg yolks.
- Cook noodles in a large pot of salted, boiling water according to package directions (you want them al dente). Drain and run under cold water to stop them from cooking further.
- Place noodles in a single layer on a kitchen towel and cover with a damp towel.
- Preheat oven to 350°F.
- In a large pan (12 x 18 x 2, or multiple smaller pans, just make sure they are 2 in. deep), ladle a thin layer of sauce.
- Cover sauce with noodles, laid lengthwise, then cover with sauce, a thin layer of ricotta, a sprinkle of grated mozzarella and Pecorino Romano.
- Continue to layer in this order, but alternate direction of pasta (lengthwise then crosswise).
- Finish with a layer of meat sauce covered with sliced mozzarella and Pecorino Romano.
- Bake for 45 minutes or until cheese has melted and lasagna is bubbling.
- Remove from oven and allow to cool for 15 minutes.
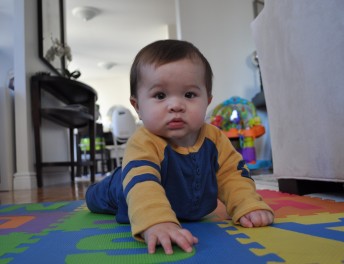
Rylan 7 Month Summary
Rylan turned 7 months old this past weekend! Time continues to fly as we’ve had a busy month – numerous trips for Brad & I, a long visit from Grandma, and a quick trip down to see Uncle Cameron get married. Rylan also had his first real cold this month. He has been a trooper through it all and kept his happy disposition.
Rylan has been very active lately, and is on the verge of crawling. It’s funny how I couldn’t wait for Brandon to be able to crawl, but with Rylan, it’s kinda nice being able to put him down and not worry about him getting too far or into trouble. That comfort is pretty much out the window, as he has mastered the inchworm and can work himself across a room in no time. I still can’t leave him alone in a sitting position as he tends to throw himself at whatever he is trying to grab. I’m beginning to wonder where his sense of self preservation is, or if little boys even have one at all!
He’s pretty excellent about entertaining himself, and is usually content just hanging out on the floor with a toy or two. I’ve learned that I have to monitor which of Brandon’s toys he gets his hands on (even though nothing in their reach is a choking risk since Brandon is still only 2), as he will bite down on a toy so hard that he’s actually drawn blood. I’m really glad I stopped breastfeeding!! 🙂
Sleeping has been a little erratic this month, between travels and the little cold he battled. Nothing crazy, but we had a few nights where he would wake-up crying 1 or 2 times. I want to note that even though I am a sleep training (i.e. cry-it-out) advocate, when my baby is sick or in an unfamiliar place while traveling, I don’t let them cry more than a few minutes (just to see if they are passing between sleep cycles). Once the illness has passed or we are back home, it might be a little rough going for a day or two, but it’s usually not bad. Having a baby who has been sleep trained and who regularly sleeps with no problems is actually helpful in these situations, as you know they are crying for a real reason, and that they probably need to be checked on.
Rylan loves his solid foods! There has only been one instance so far where he hasn’t finished off his meal, and he was pretty congested at the time. I did try and increase the amount of food I was giving him, but then he started taking less formula, so I scaled back down. At this point getting him his required ounces of formula each day is more important than more mashed bananas. I plan on introducing some meat and yogurt to his meals this month. I can’t wait till next month when we can start on finger foods!
Here’s a typical day for Rylan at 7 months:
- 7:30 am – wake-up, get dressed and bottle (8 oz with 1 T rice cereal)
- 7:45 – breakfast w/ Brandon (usually in bouncy seat, not eating solids here)
- 8:15 – Outside!
- 9:30-11 – nap #1
- 11 – “play” with Brandon
- 11:30 – Independent Play (blanket time while mom preps lunch)
- 11:45 – bottle
- 12 – lunch (Solids – we introduce new foods at this time, so not to mess with bedtime if he has an adverse reaction).
- 1-3/3:30 – nap #2
- 3:15/3:30 – bottle
- 3:30 – “play” with Brandon (tummy time) or Outside
- 5-5:30 – nap #3
- 5:30 – independent play in play pen
- 6 – dinner with family (Solids)
- 6:40 – bath
- 7 – bottle (8 oz with 1 T rice cereal)
- 7:30 – bedtime!
Tuscan Ribolita with Tomato Garlic Bread
Originally posted on Culinary Wannabe – this is one of my favorites!
We have had a busy week packing up the fam to head down to GA for my little brother’s wedding, so I thought I would share one of my all time favorite Fall go-to’s that I’m sure you will love. This soup is loaded with veggies and beans, possibly making it the healthiest thing I’ve posted to this blog thus far. But that’s not the reason I love it – I love it because it tastes amazing!! It’s a slow cooker recipe, so the prep is a cinch. Go ahead and whip up a bowl of this delicious and soul satisfying soup this weekend. And even though there already are some scrumptious little bread pieces in there, I just can’t have a bowl of soup without some crusty bread to dip into it. So here’s my recipe for tomato bread – so yummy and the perfect compliment to this soup.
Hope everyone is off to a great Fall!
Tuscan Ribolita
Adapted from Slow Cooker – Willams-Sonoma
1/4 cup olive oil, plus some for drizzling
2 yellow onions, chopped
2 garlic cloves, minced
1/4 cup tomato paste
8 cups chicken or vegetable broth
6 cups canned cannellini beans, drained and rinsed
1 bunch kale or savoy cabbage, coarsely chopped
4 carrots, coarsely chopped
2 stalks celery, coarsely chopped
1 tablespoon fresh thyme, minced
Salt and pepper
3 cups day-old crusty bread
Parmesan cheese shavings (optional)
- Warm olive oil over medium heat in a frying pan.
- Add onions and garlic and cook for 5 minutes, or until softened.
- Stir in tomato paste and cook for an additional 2 minutes.
- Add broth to the pan and bring to a boil.
- Remove from heat once the liquid begins to boil.
- Place beans, kale, carrots, celery, and thyme in slow cooker.
- Add 2 teaspoons of salt and 1 teaspoon of pepper.
- Add in the broth.
- Cook in slow cooker for 4 hours on high or 8 hours on low.
- Stir bread into soup about 10 minutes before serving.
- Season to taste with additional salt and pepper.
- Optionally, each serving can be drizzled with olive oil and parmesan shavings.
Tomato Garlic Bread
Garlic cloves, peeled
Tomatoes, halved
EVOO
Coarse Salt
- Lay the slices of bread over a hot grill pan for a few minutes on each side until they are toasted and have nice markings.
- Rub each piece of toast with a garlic clove then the cut side of the tomato half.
- Drizzle with a little bit of olive oil and follow with a sprinkle of salt.
September Restaurant Round-Up
Here’s where we went in September:
This little west village gem was the site of our bi-monthly book club meeting. It’s totally charming and pretty spacious given the location. The appetizers were varied, unique, and delicious – making this a great group spot. They even grow some of their own ingredients on top of the restaurant in their rooftop garden. It’s not necessarily the best meal I’ve ever had, but it was casual and fun, and an excellent value spot. Be sure to take advantage of the $1 oysters at the bar!
Remember when I said that Jean-Georges restaurants tended to be hit or miss (last month’s review of ABC Kitchen)? Well, this was a miss. From the wall-to-wall carpet, to the been-there-done-that food, this place screamed hotel restaurant. With so many other amazing options in NYC, this one is a total pass.
Even though I mentioned this restaurant before, I have to rave about it again. Brad and I went here for our 4 year anniversary dinner and did it big with the 20-course tasting menu. It was AMAZING!!! If you are looking to do something really special in NYC, this is it. I seriously think I liked it better than the tasting we did at French Laundry (like that name drop? Just trying to keep things in perspective here!). The service is stellar and the food is inventive and ridiculously good. There were multiple times throughout the night when Brad and I would just look at each other completely unable to describe the amazing food in front of us. This place lives up to the hype!
People have been raving about this vegan, upper east side spot for ages. So when my mom was in town a few weeks ago, I decided it was just where we should try. Neither of us is vegan, but my mom is all into the Paleo thing and has some limiting diet restrictions, which made Candle 79 the perfect choice. I thought all of the food was very flavorful, but I really wasn’t fond of many of the “imitations” they tried to pull off. If you are vegan and haven’t had feta cheese in years (or ever), than you might love the nut version. But I just thought it was a poor second. Same for the meat substitutes. What can I say, I’m partial to my high-calorie, artery-clogging options. If you are vegan, you absolutely should try this place. If you aren’t, go with a vegan friend and stay away from any meat/cheese substitutes.
My new favorite sushi spot (sorry Yama!). This place totally rocked my world. I personally like my sushi with a bit of flare – some kind of fruit, crunchy topping, something that makes it more than just a piece of fish. My husband, sticking to his Japanese roots, likes the more traditional sashimi style, with an emphasis on the freshest fish available. We have found our happy medium at Gari. They are known for their “toppings,” which add just the right amount of oomph but still lets the beautiful flavors of the fish shine through. We tried the tuna with tofu puree, salmon with sauteed tomato, and yellowtail with jalapeno sauce, with the salmon being our favorite (multiple orders went down!). Brad was also totally in love with their mini bowls of udon. There are numerous outposts of the original Sushi of Gari around town, so be sure to stop in and give one a try!
Independent Play – Moving to Room Time
I got a lot of positive feedback from my first Independent Play post, so I thought I would continue it, and share some thoughts on how to keep it in place for your older child. Obviously, there will come a point when your toddler will no longer want to play in a playpen. I would say somewhere in the 18-24 month range, your child is going to be ready to move to doing independent play in their room. Room time can be a wonderful thing – it allows for more play options for your child, a wider space, and hopefully, some time for you as a parent to get things done while your child is happily entertained. It forces them to not only find ways to play by themselves, but to also choose between various options. I find that Brandon behaves better and is more focused throughout the day when he has his time to play alone. What a nice treat for mommy and child!
Here are my keys for moving from the playpen to room time:
- Make it Safe – it goes without saying, but you must baby proof the entire room. We have locks on the closet doors, outlet covers, straps for the furniture, etc. Watch your child while they play in their room and notice if anything seems like it potentially could be dangerous. Always ere on the safe side.
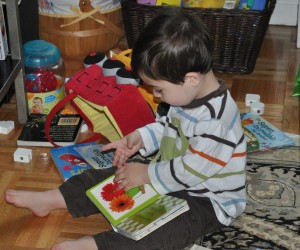
- Limit the Fun – when you are just starting out, having all their toys accessible to them can be totally overwhelming for a child. It can also cause for a huge mess since they will probably pull out anything they can get their hands on. Limit what they can get out (at least to start), and keep the toys in rotation so that they stay interesting. I actually have a special basket that I keep in the closet that is full of toys that Brandon only gets to play with during this time. He has his regular toys as well, but these additional “special” toys add extra appeal.
- Give them Boundaries – after spending months in the rather confined space of a playpen, a whole room can be very intimidating. My husband thought of a great way to help with this, and actually brought out the mat insert that sits in the playpen and put it in the center of the room. Brandon spent the whole first week on that mat before he eventually ventured off (further proof that kids actually respond well to some boundaries!). We still put out a special quilt that my mom made during his room time, and he usually sits on it most of the time. Moms of rambunctious boys – you will be totally shocked how your little crazy man will sit still when he is finally given the option!
- Be Accessible, but Hidden – a baby gate in the door frame is the perfect way to keep your child in their room, without closing the door. Try to stay out of your child’s line of sight, as I’ve found that once they see mommy or daddy they get distracted and will often want to come out to play. Just like when they were younger, a monitor (especially a video one – just because it’s fun to see what your child does when he thinks no one is looking!), is really helpful here.
- Give it Time – once you move to room time, you really can, and arguably should, stretch the amount of time your child spends playing alone. I have personally seen the benefits a child reaps when they are forced to figure things out for themselves, and you need to provide them with enough time to do so. I would try and do at least 30 minutes. We do 30 minutes with Brandon (who is now 26 months) twice a day when he doesn’t have school (once when he does). You could also do one hour once a day. Fit it into your schedule and try and make it a consistent time each day so that your child knows what to expect. A great tip is to get a timer and set it for the amount of time, that way your child knows when it goes off that time is up, not when they just decide to whine for you to come and get them.
- Expect Good/Bad Days – there are inevitably going to be days when your child does not want to play by themselves, even after you’ve worked them into it at the beginning (yes, there might be some tears and whining when you start out – stay strong and keep the time frame short, they will grow to love it!). I’ve come to find with my own children that they get a little more clingy when they are either teething or about to get sick. On these days, I don’t force the issue and I just skip independent play. But children are smart, and if they realize that putting on a pout will get them their way, then they will continue to do so even after that little cold is gone. At that point, it might take tough love for a day, but we get back into our routine and they are good as gold before you know it. On the flip side, there are many days when Brandon doesn’t even want to leave his room after his time is done. He will figure out a new toy (one that he would have whined to me about helping him had I been there) and want to keep playing. This is what it’s all about.
- Clean Up – another great skill for your child to learn is the art of cleaning up the messes we make. At the end of each room time, help your child to put away their toys and leave their room tidy. Sing the song and slap high-fives when they’re done, most kids (surprisingly) seem to think this part is almost a game.
I am (rather obviously) a huge advocate for independent play. It’s good for the kids while they are doing it and allows me the time I need to accomplish things, so that I can focus solely on the kids once they are done. Please let me know if you have any comments on what has worked for you and your family, and whether your kids like to play by themselves – I always love to hear new ideas!

